Detailed explanation of DNA spiral table lamp production
step 1:
Some time ago I wanted to make a lamp with a sense of design, but a few days of hard thinking and meditation did not yield any results.
One day I was working on a chair in the basement, and suddenly I found a bag full of wooden pins that my father had used before.
I have always hoped to be able to make something out of wood, so I thought: I don’t use it at this time, but when should I wait? But I don't want to waste this wood, just cut it and make some simple things out.
So I started brainstorming with these wooden pins, until that moment, I knew what I was going to do-a spiral-structured desk lamp.
Step 2:
The length of the wooden pins is about 7cm (2.75 inches) and the diameter is 5mm (0.19 inches), so the lamp made this time is very small. Of course, if you want to make a larger size, you need a larger wooden pin. If you don’t have wooden pins on hand, you can use a cardboard tube instead. See Step 2 for the specific production process.
In short, I recommend that you use LED tubes, at least energy-saving lamps, especially cold light ones.
Step 3:

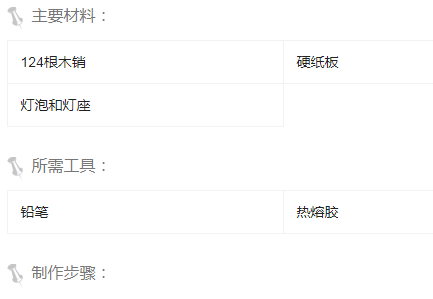
Equipment needed:
124 wooden pins
Hot melt glue
cardboard
ruler
pencil
Bulbs and sockets
*The hot melt adhesive was chosen because it dries quickly (well, I admit that I am too impatient). If you want the lamp to have better insulation, the effect of using white glue will be better
Step 4:

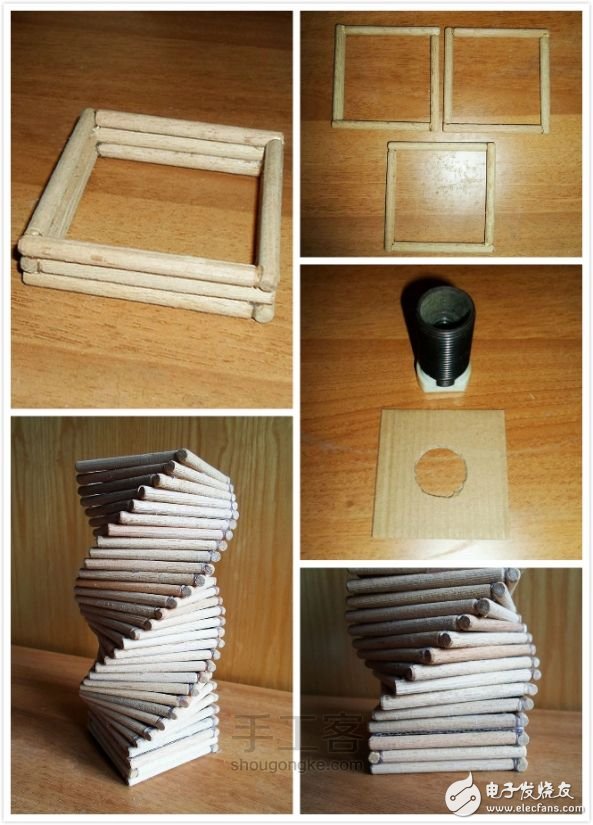
Assemble wooden pins:
As shown in the picture, take four wooden pins and put them together to form a square, and each wooden pin forms a side. Since the ends of the wooden pins are round: so I used the sol method in the picture above. By analogy, make 31 squares of the same size.
Step 5:

Making the lampshade:
Take two squares, stack them together, and then rotate the upper square a little bit to the right as shown in the figure, so that the corners of the two squares will not overlap. This step may be more intuitive to see the picture. .
When stacking, make sure that the sides of the square are facing one direction, so as to be more beautiful. Glue the areas where the square touches together. I only glued the knot contact parts on the two opposite sides, if you want, you can glue all the contact parts. Then by analogy, stack up the remaining squares, stacking a total of 28, try to ensure that the angle of each rotation is the same.
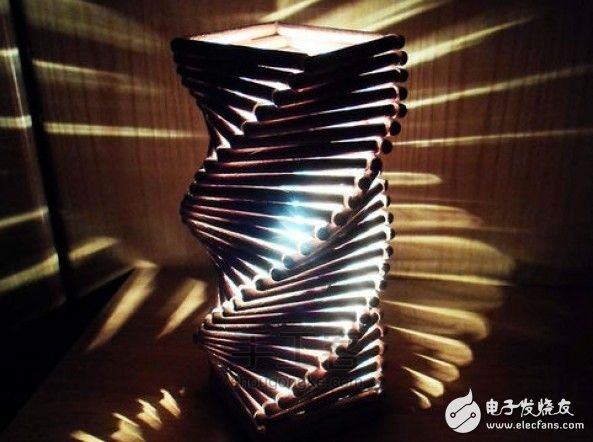
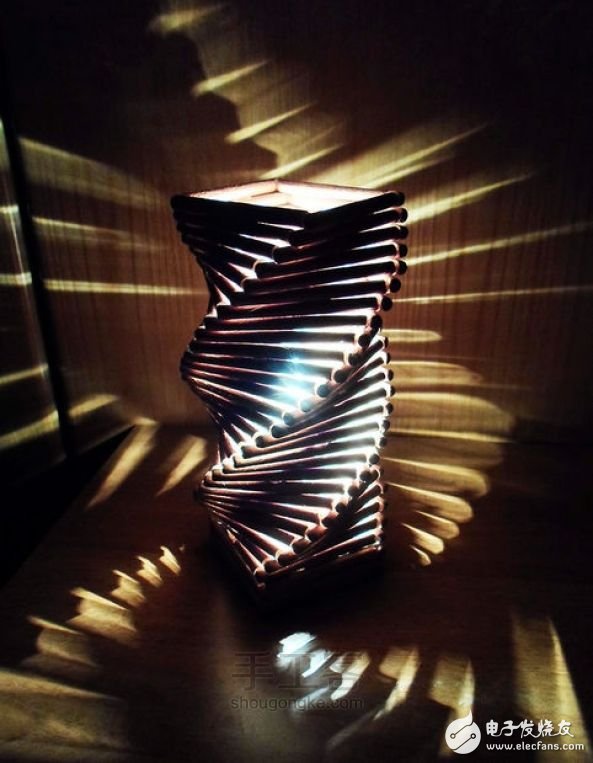
After completion, the lampshade naturally shows a spiral structure.
Step 6:
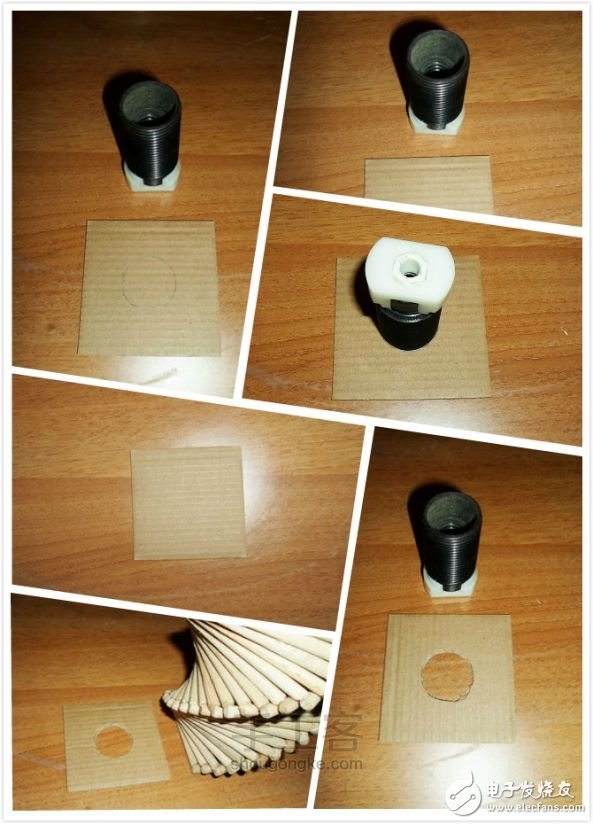
Making the lamp holder board:
Because the wooden pins are 7cm (2.75 inches) long, I cut a 7×7cm cardboard to use as the lamp holder board. Of course, the exact size depends on the length of your dowel.
Trace the position of the lamp holder on the cardboard, and then cut off the part. Make sure that the lamp holder can pass through the hole just now, and then glue the lamp holder board under the lampshade.
Step 7:

Making the base:
Take the remaining three squares and stack them together. The middle face is opposite to the upper and lower faces. Be careful not to rotate at this step, and then glue them together as the base of the lamp.
The last step is to glue the base onto the lampshade, and you're done!
Then plug the bulb socket onto the socket plate and turn on the power. . . The lighting effect is absolutely great~
Ningbo Autrends International Trade Co.,Ltd. , https://www.mosvapor.com